But first, I forgot to mention about the hands. In the previous posts, I had mentioned that the original hands for this doll looked a little too small in proportion. When the doll pieces are laid out with the original hands, it looks something like this:

Large head, large feet, itty bitty little hands. While they are the same size as my other Ichimatsu doll, I can't get over how disproportionately small they are. When you press your hand to the bottom of your foot, the finger tips generally go up to around the ball of the foot. Luckily, I had another doll in storage that had slightly larger hands, so I was able to switch out the hands.

The old hand is on the left, new hand on the right. It isn't much bigger, but the fingers reach closer to the ball of the foot, so it is a good replacement.

When the parts are laid out, the hands are still small, but a little better proportioned to the rest of the body parts.
The old hand is on the left, new hand on the right. It isn't much bigger, but the fingers reach closer to the ball of the foot, so it is a good replacement.
When the parts are laid out, the hands are still small, but a little better proportioned to the rest of the body parts.
Paint!:Supplies needed:
Paint brushes - one medium sized, and the other as tiny as possible, with short bristles
Makeup - eye shadows and/or blush. You will need flesh tones and pink. You can also use chalk pastels (not oil pastels) for shading if you prefer.
A makeup sponge.
Paint brushes - one medium sized, and the other as tiny as possible, with short bristles
Makeup - eye shadows and/or blush. You will need flesh tones and pink. You can also use chalk pastels (not oil pastels) for shading if you prefer.
A makeup sponge.
Q-tips cotton swabs
Acrylic paints - white, black, various flesh tones, and a lip color of your choice
Clear spray varnish, in either matte or satin finish
Clear paint-on gloss varnish


Once all the pieces are the same shade of white, they are ready for flesh tones.


Nearly the same color. However, in natural light I feel that my girl Ichimatsu doll is nearly white, which is fine for a girl doll, but I think boy dolls look more natural with a darker skin tone. So I decided to mix up a slightly darker flesh color.

I mixed together 1/2 teaspoon of Porcelain Doll by Martha Stewart, 1/4 teaspoon of Medium Flesh #20556 by Apple Barrel Colors, and 1/2 teaspoon of water. For the hands and feet, I inserted a chopstick into each limb so that I could paint them without touching the wet paint, and then placed the chopsticks in a tall container to dry between layers. With this new flesh tone mix, I painted 3 more layers, letting it dry thoroughly between coats so that the paint would not become tacky. 5 or 6 layers of watered down paint should give a nice and even coverage.

Blurry picture, but you can now see that this flesh tone is just a little bit darker than before.
When I draw a portrait of someone, I like to start with the eyes first before doing the rest of the face. I feel that this helps me make the eyes pop as the point of interest. Therefore, I begin with painting the doll's eyes first.


 A little bit of shading helps bring out facial features even more. I chose to not draw on lower eyelashes like is typical on Ichimatsu dolls. I tried it and ended up wiping it off because it looked too unnatural.


For the eyebrows, I used black and brown colored pencils. The shape can be difficult to get right, so thankfully colored pencil also washes off easily. I also decided that the bottom eyelids should be darker, so I feathered a little black colored pencil eyeliner on the outsides, fading as it gets closer to the insides of the eyes.

Once happy with the paint and shading, take all the pieces outside and spray them with Matte or Satin varnish in light coatings. I used Satin Finish varnish by Krylon. Satin retains a little more sheen than matte. Matte would leave a more powdery look, not shiny at all.
Once dry, bring the pieces inside and clean up the eyeballs as much as possible with a wet cotton swab. Using the smallest tip paint brush, paint on gloss varnish to each finger and toenail, over the lips, and over the eyeballs.

 The head and bust resewn to the body, using a heavy-duty needle and lace crochet yarn. I pulled the bust down really tight onto the body to force the shoulders to bulge more upwards, that way the slope of the shoulder isn't as pronounced as it was on the original doll. (Now that the spray varnish has dried, you can see the slight sheen of the satin finish.)

The feet were attached by sewing the yarn through a series of four holes in each foot.
 Since the hands were taken from a second doll, it can not be reattached using the same sewing method. At the top of these hands is a small crevice around the top. I smeared E6000 glue in that crevice, inserted it into the fabric arm, and tied some lace crochet yarn tightly on the outside, into the indented crevice. When reattaching the hands and feet, take care to line everything up evenly, and proportionate to the rest of the body.


My son approves of the little doll.

Since I did not put any clay on the hands, they need to be primed with white paint first before they can be painted, that way they will be the same flesh color as the rest of the body parts. I used watered down white acrylic paint in three layers, but you may be able to do just one coat of straight acrylic, just be sure to let the paint dry thoroughly between paint layers.
Once all the pieces are the same shade of white, they are ready for flesh tones.
For the flesh paint, water down your paint. I did 1/2 teaspoon of paint and 1/2 teaspoon of water. This is after 3 layers of watered down skin tone paint applied with a medium brush. This color is called Porcelain Doll, Multi-Surface Satin Acrylic by Martha Stewart Crafts. It is paler than most porcelain dolls I've seen, but is a good shade for a light-skinned Ichimatsu doll. For comparison, here is it next to my girl Ichimatsu doll in better daytime lighting:
Nearly the same color. However, in natural light I feel that my girl Ichimatsu doll is nearly white, which is fine for a girl doll, but I think boy dolls look more natural with a darker skin tone. So I decided to mix up a slightly darker flesh color.
I mixed together 1/2 teaspoon of Porcelain Doll by Martha Stewart, 1/4 teaspoon of Medium Flesh #20556 by Apple Barrel Colors, and 1/2 teaspoon of water. For the hands and feet, I inserted a chopstick into each limb so that I could paint them without touching the wet paint, and then placed the chopsticks in a tall container to dry between layers. With this new flesh tone mix, I painted 3 more layers, letting it dry thoroughly between coats so that the paint would not become tacky. 5 or 6 layers of watered down paint should give a nice and even coverage.
Blurry picture, but you can now see that this flesh tone is just a little bit darker than before.
When I draw a portrait of someone, I like to start with the eyes first before doing the rest of the face. I feel that this helps me make the eyes pop as the point of interest. Therefore, I begin with painting the doll's eyes first.
Using the tiniest paint brush with short bristles, carefully paint the underside of the top eyelids black. For the lower eyelid, paint the inside of the lid a flesh tone that is a shade or two darker than the skin. I used Medium Flesh #20556 and Flesh #20514 by Apple Barrel Colors.

Next, the lips. Typically, girl Ichimatsu dolls have red lips. I wanted my boy doll to have a more natural dusty pink color, like my own lips. I used FolkArt acrylic paints for the lips, but I did not remember to measure each mixed color... ^_^; If I remember correctly, I measured with my medium paint brush: 2 scoops of 413 Pink, 1 scoop 420 Linen, a small dot of 231 Real Brown, all by FolkArt. I painted this mixed fuchsia pink on the lips within the lip's outline. For the crevice between the lips, I added more brown paint to the pink mixture to make it darker.

Inside the ears, paint Medium Flesh in the crevices, and darken with Flesh, and use Real Brown for the ear hole. Use the same colors to shade the philtrum under the nose, and around each nostril, putting brown in the center of each nostril.
Next, the lips. Typically, girl Ichimatsu dolls have red lips. I wanted my boy doll to have a more natural dusty pink color, like my own lips. I used FolkArt acrylic paints for the lips, but I did not remember to measure each mixed color... ^_^; If I remember correctly, I measured with my medium paint brush: 2 scoops of 413 Pink, 1 scoop 420 Linen, a small dot of 231 Real Brown, all by FolkArt. I painted this mixed fuchsia pink on the lips within the lip's outline. For the crevice between the lips, I added more brown paint to the pink mixture to make it darker.
Inside the ears, paint Medium Flesh in the crevices, and darken with Flesh, and use Real Brown for the ear hole. Use the same colors to shade the philtrum under the nose, and around each nostril, putting brown in the center of each nostril.
Shading:
I've already done a little bit of shading in the above picture, but let me show you real quick what colors I used:
I like to use regular old makeup for shading. I blends so much better than paints, but you do need to be mindful to not smudge it off with your fingers. If you make a mistake, simply wipe it off with a moist paper napkin. I used the top two orange-flesh tones to shape under the nose and the sides of the nostrils, inside of the ears, and the eyelids. I used pink blush and a makeup sponge to add blush to the cheeks, and the bottom three blush colors to darken areas around the nostrils, in and behind the ears. The darkest shade of pink blush was used behind the ears.
For the hands and feet, I first painted thin lines of Medium Flesh, and Flesh acrylic between the fingers and toes to make them appear more separate. For shading, I rubbed on pink blush with a makeup sponge (cotton swab for small areas) on each finger tip and toes, up to the first knuckle. If you look at the bottom of your feet and palms of hands, they are pink on the raised areas. I again rubbed more pink blush into those areas of the feet, and lightly on the palms. I then used my orange flesh colored eye shadows over the second knuckles of the hands, and the darker blushes from the makeup palette to shade the crevice under the toes, and shading around the ankle area.
I did not paint the finger and toenails a darker shade than the blushed fingertips. When I look at my own nails, there is not much color difference other than the shinier surface, so I decided to leave the nails untouched at this point. You may choose to paint the nails if you like, Linen color acrylic by FolkArt would be a perfect color for the tips of the fingernails.
For the eyebrows, I used black and brown colored pencils. The shape can be difficult to get right, so thankfully colored pencil also washes off easily. I also decided that the bottom eyelids should be darker, so I feathered a little black colored pencil eyeliner on the outsides, fading as it gets closer to the insides of the eyes.
Once happy with the paint and shading, take all the pieces outside and spray them with Matte or Satin varnish in light coatings. I used Satin Finish varnish by Krylon. Satin retains a little more sheen than matte. Matte would leave a more powdery look, not shiny at all.
Once dry, bring the pieces inside and clean up the eyeballs as much as possible with a wet cotton swab. Using the smallest tip paint brush, paint on gloss varnish to each finger and toenail, over the lips, and over the eyeballs.
Reattach the parts to the body:
With this type of porcelain doll, the hole at the top of the body was originally left open. In order to keep the stuffing from escaping up into the head, I decided to sew the opening shut with lace crochet yarn. Different types of porcelain dolls are assembled differently, so reassemble the doll as it was done originally.
The feet were attached by sewing the yarn through a series of four holes in each foot.
Here he is in front of his "sister". He is 40cm tall, and she is 40cm tall with her attached stand, so he will be slightly taller when I get around to making a stand. I need to come up with names for them... Hmn, decisions, decisions.
My son approves of the little doll.
Hair:
Originally, I was going to make and glue his hair onto his head, and cut it into a bowl cut, I had purchased the hair and everything. However, I had just happened to finish the doll the day before a doll and teddy bear convention was going on downtown, so I decided to go and see if I could find a cheap doll wig. I had to look in every booth before I found the winner:
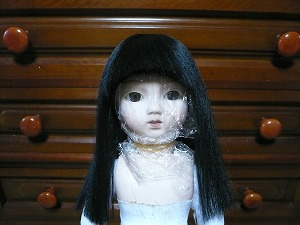
This synthetic wig is style "Marcie", size 7-8, by Haircrafter INT'L. INC. I may have tried on every short haired black wig in the convention before getting this. The bangs are not supposed to be side swept like I've done, but rather it should fall straight over the forehead. I do think it looks better without the side part, but then it covers the eyebrows, even though I ended up buying the wig in a smaller size (a lady at the convention measured his head and told me he is a size 10, but that size is too large). I am undecided if I want to leave it as is and be free to style it however, or trim up the bangs a little bit.
As far as hair goes, there are some options - you can make it yourself, or purchase a doll wig. You can find wigs online, in synthetic hair or real hair. For many porcelain dolls, wigs for Asian ball-joint dolls may fit very well, and may even better constructed. However, I do have two MSD sized ball-joint doll wigs in the traditional black long hair and straight bangs that are commonly seen on girl Ichimatsu dolls, and I feel that my doll wigs' bangs are too sparse to cover the forehead adequately.
For the traditional girl hairstyle, I think it may be best to go about making the hair yourself. I have not tried it yet, but I have looked around online for some ideas.
On this website, a person shows refurbishing an old folk doll with straight black hair and bangs.

On this website it shows how to make an Ichimatsu doll style wig using a felt base. I think that combining this method with the website above is the most accurate course of action. My manufactured Ichimatsu girl does have felt glued underneath her bangs, which helps keep her bangs looking full and black very effectively. This tutorial shows sewing the hair to make a part down the center of the head, however Ichimatsu dolls generally don't have a part, but rather the center of the hair in glued on and spread out evenly around the head as is shown in the above tutorial. Doing it without the sewn part would be most accurate.
For the traditional girl hairstyle, I think it may be best to go about making the hair yourself. I have not tried it yet, but I have looked around online for some ideas.
On this website, a person shows refurbishing an old folk doll with straight black hair and bangs.
On this website it shows how to make an Ichimatsu doll style wig using a felt base. I think that combining this method with the website above is the most accurate course of action. My manufactured Ichimatsu girl does have felt glued underneath her bangs, which helps keep her bangs looking full and black very effectively. This tutorial shows sewing the hair to make a part down the center of the head, however Ichimatsu dolls generally don't have a part, but rather the center of the hair in glued on and spread out evenly around the head as is shown in the above tutorial. Doing it without the sewn part would be most accurate.
Thanks for this tutorial! Your doll came out wonderfully! I am going to do something similar.
ReplyDelete