October 13, 2013

Shichi-go-san, Kimono finishing

Okay, here are the last steps in finishing this awase kimono: attaching the sleeves and collar.

But first, a note about collars. There are three main types of collars, hiro eri, bachi eri, and bou eri.

Hiro eri is most common for women's kimono, both formal and informal. It is a wide collar that is meant to be folded over and is adjustable in width according to how the wearer wishes to do it.

Bachi eri is a collar that is already folded over into shape, narrower near the neck and gets wider towards the bottom. It is most common on informal kimono and yukata for women.

Bou eri is a collar that is already folded over and is an equal width for the entire length. It is most common on men's and young children's kimono, but can also be done on women's kimono as well.

Since I am doing a child's kimono, I will be doing a bou eri. Instructions for doing a bachi eri can be found here. A hiro eri can be made similarly to how the okumi panels were sewn: outer and lining pieces sandwiched on the kimono, sewn, pressed, outside edges turned under and hand sewn.

1. Sleeve attachment prep
Before attaching the sleeves, the sleeve openings on the body should be prepped. First, prep the miyatsukuchi, armpit openings. Remember when the side seams of the body were sewn, the top few inches were sewn with the lining and outer fabric seams independent. This is so that the raw edges can be spread open to go line the opposing sides of the miyatsukuchi.
This is probably easier said than done, but, carefully spread open the excess seam allowance on the insides of both the outer and lining layers and iron iron them flat. 

Next, mark where the sleeves will be attached. Whatever preferred marking method should be fine. I preferred to iron creases to use as my marks, so similar to how the hems were prepped, I folded under the free edges and ironed.
Fold under the lining along the miyatsukuchi slightly shorter, whereas the rest of the lining where the sleeve attaches can be flush with the outer layer, or slightly longer. Press to crease fabric.


Open up the inside of the sleeve body opening and press again the seam under the miyatsukuchi, to flatten the seam allowance that is changing direction from the sewn seam.

Now to prep the sleeves for attachment. Remember in the first post I mentioned that it was important to make sure the two sleeves were mirrored in how they were put together and direction the seams were pressed.

If you open up the bottom of the sleeve and look through the lining fabric (or feel, if the lining isn't semi-sheer) you will see that the seam allowance along the bottom is on one side only - that side is the front of the sleeve.

I prepped the open end of the sleeves the same way as the body, by ironing, but mark sew lines in a way that works best. I folded under and ironed the outside first, then did the lining slightly longer than the outer fabric.

2. Attach sleeves, outer fabric
This part was a bit difficult due to the small size of the kimono. Open up the ironed edges of both the sleeve and body sleeve opening, find and line up the shoulder folds on both and pin the two with right sides together. I inserted the pin into the ironed crease in the sleeve, and carefully manuver the pin to go through the crease of the body seam crease. Continue pinned down both sides all the way down to where the lining is attached to the back of the sleeves.

Sew the sleeve on, stitching directly in the ditch of the ironed crease. Due to the small size and curve of the pinned sleeve, I removed the footplate of my sewing machine. The last pin marks where the lining is attached, pull the lining aside so as not to accidentally sew through it. (The exposed sewing thread is basting stitches, don't worry, I'm not pulling on my lining!)


Push the seam allowance towards the sleeve and iron about 2mm past the stitch line.


Open up and iron the outside.

Turn over and iron flat the seam allowance on the inside where it is changing directions for the miyatsukuchi.

3. Sleeve attachment lining
Now to do the lining. Turn the entire kimono inside out.

Begining from the miyatsukuchi, pin the lining to body. Smooth out the lining fabric from the center seam to make sure the lining is ironed under correctly, if not, iron again. Pin first only the body half of the lining to the sewn sleeve seam. When it was prepped before, the lining edges on the body lining should meet or cover the sewn seam.

Next work on pinning the sleeve lining to the body lining, replacing the pins where the lining overlaps. Smooth out the sleeve lining as you work to make sure it isn't to long or too short, iron the crease again if needed. The sleeve lining should overlap the body lining slightly, a few millimeters.

Sewing the lining by hand using that back and forth zipper like stitch, being careful to only sew through the folded under seam allowance, and not go through the outer layers of fabric. Sew a couple of reinforcing stitches at the bottom corner of the miyatsukuchi and where the sleeve begins to attach to the body.


And the sleeves are finished! Turn everything right side out again and iron again below the miyatsukuchi where the lining seam allowance changes directions.


Now all that is left to do is the collar. Before doing the collar I made some himo to attach. Only children's kimono have attached himo.
I just used leftover lining polyester. Fold a long rectangle in half, sew up two of the sides, clip the corners, turn right side out with a chopstick and iron flat.

4. Collar - TomoeriSince this is a children's kimono, I did a bou eri. I put some tips at the top of the post for doing bachi eri or hiro eri. I cut my eri (collar) strips with a 1-1.5cm seam allowance on either side, and a couple centimeters longer than my intended length.
Tomoeri is the shorter protective top layer of the collar around the neck. It can either be sewn on after the collar is attached (which is easiest, and allows for easy removal for cleaning) or it can be sewn on prior to attaching the collar which gives a neater feeling. I tend to do the second method.

Fold over and iron about 1-2cm on either end of the tomoeri. Fold both the eri and tomoeri strips in half to find the center and mark both sides with pins.

Place the tomoeri on top of the eri, line up the pins marking the center of both and pin the two together. Place pins at the bottom ends of the tomoeri through only the folded under seam allowance and eri strip (do not pin the top layer of the tomoeri).

Carefully lift the tomoeri away from eri and place at least one more pin in the center of the folded under seam allowance. The center marking pins can be removed.

My ironed crease became very difficult to see... but sew a couple millimeters inside of the ironed crease.

When the layers are separated to sew this part, it forms a sort of ring. Pay would-be assistants with fruit snacks and apple juice. He is supervising, "Good job mommy".

As it is now, the tomoeri is a bit shifty, since it is sewn a few millimeters in rather than sewn flat. I want there to be a folded over edge between these layers, but I do not want the tomoeri to shift around and expose the stitches like shown above, so I tack the fold down with a tiny stitch.

Similar to how the hem padding was tacked into place, sew slightly outside of the stitch line, long stitches on the back and tiny nearly invisible stitches on the front.

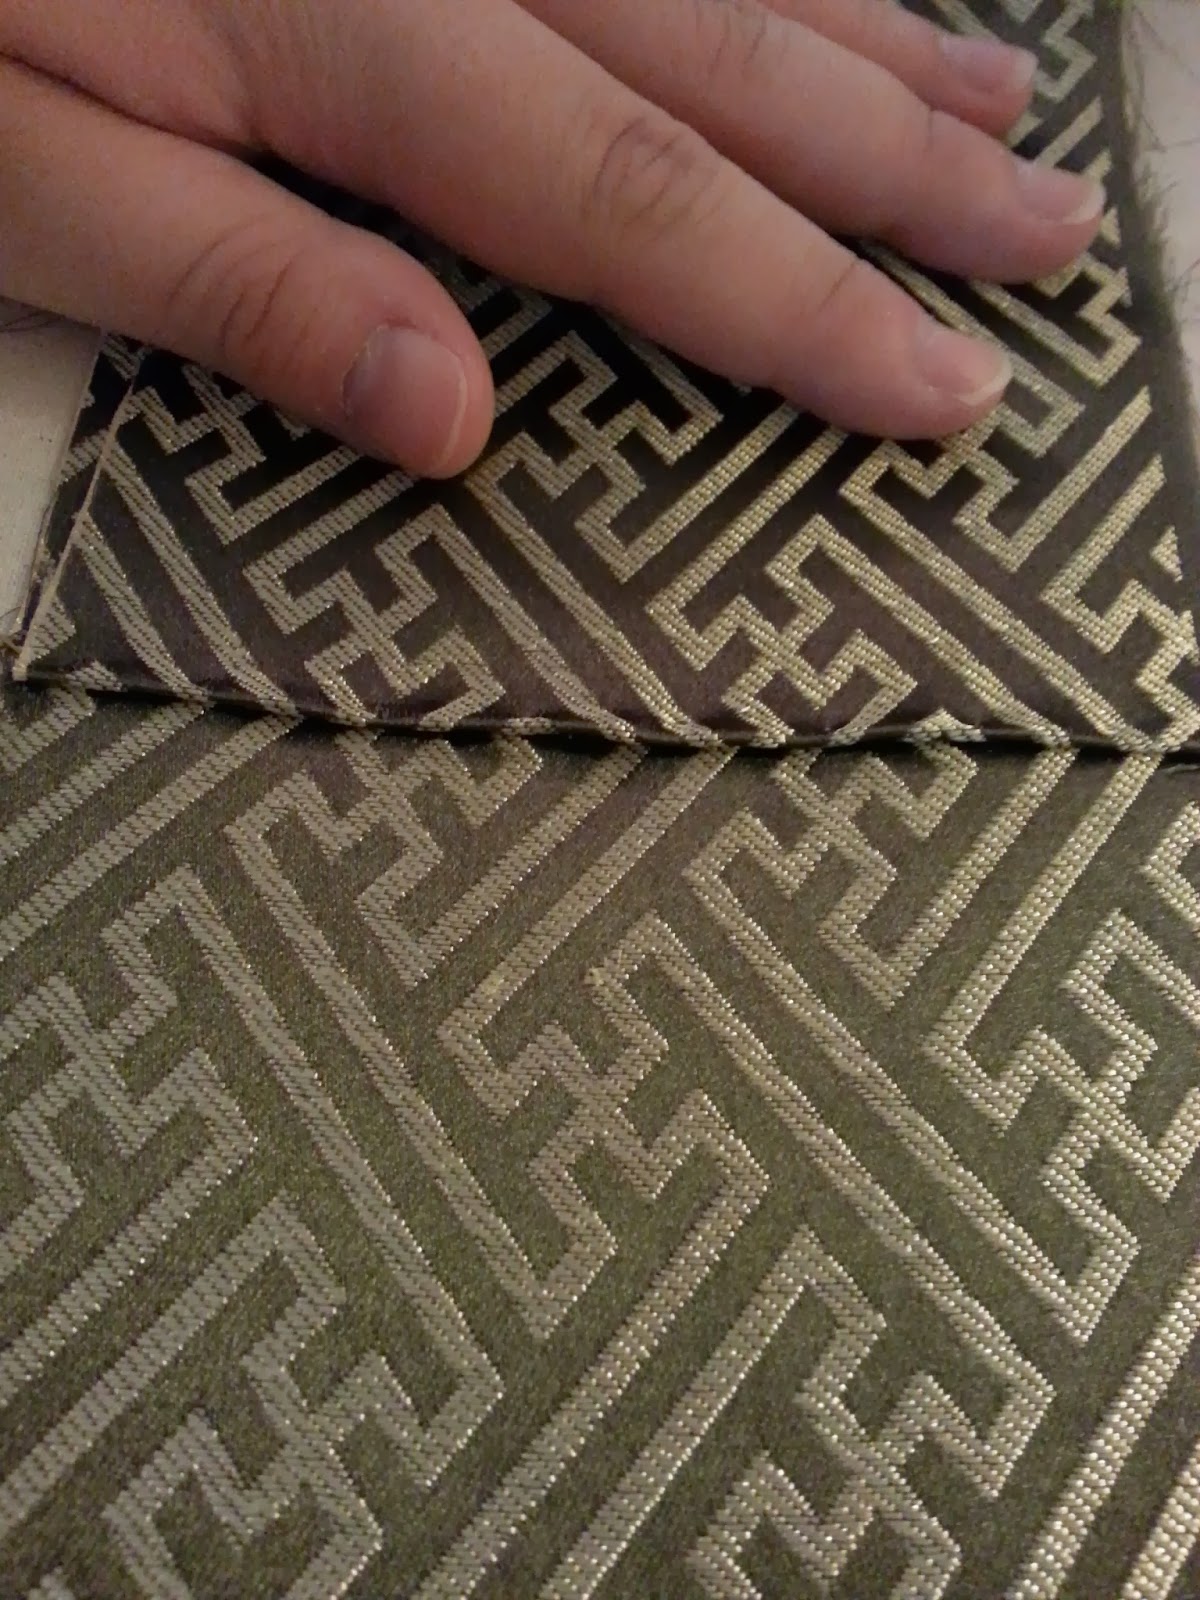
Now the folded over ends of the tomoeri can not be pulled apart and those tack stitches can not be seen.

5. Bou eri collar attachment
I will be honest and say, this is the most difficult part. This time in particular was especially difficult. I don't know if it was because my fabric is slippery or the small size of the kimono made it difficult line up both sides of the collar evenly, but this part literally took me 3 hours to get right! Geez! I was certain I was going to have nightmares of perpetually trying to fix uneven collar placement. Normally I don't have these problems, but patience and perseverance pays off!
My best advice is to use another kimono to reference collar placement. I used my son's dinosaur yukata that I made for him a couple years ago, which is the same size. First measure on the existing kimono the width of the collar from the center back seam, place a pin on either side of the cut collar slits, mark with pins.

Then measure the distance from the first mark to where the collar intersects the okumi seam, mark that on the unfinished kimono.

Then measure on the existing kimono the distance between the okumi seam intersection and where the collar ends on the outside of the okumi. Place the tip of the measuring tape on the okumi intersection marking pin and measure down to the same distance and place a pin on the edge of the okumi to mark the end of the collar.

I also measured my himo placement and pinned them in place.

Lay the kimono on the floor and open up the front so that the cut slits open into a rectangle shape. The shoulder folds will stand upwards and sort of get in the way. find the center of the collar strip and line it up with the center back seam, right sides together and pin in place along the back of the collar.

Line up the collar strip to the first pinned mark near the shoulder. This part is tricky because of the shoulder fold getting in the way, so it will take some manipulation to get this right. You want to pin the collar at this mark (I used a 1cm seam allowance) with a gentle curve, being careful to not pin any wrinkles from the shoulder fold. It might help to hold it in your hand and push up this point with your fingers to smooth out the wrinkles and folds in this section.

Work your way down to the okumi seam intersection.

Then down to the last pin marking the end of the collar. Work the otherside and check to make sure they line up evenly, especially the tomoeri, readjust as needed.

Since pins can be known to slip out or make it difficult to see puckers, so I always stitch a basting stitch to hold the collar in place before sewing with a machine. While basting, be mindful of wrinkles around the shoulder line.

Sew the collar, again being mindful of wrinkles near the shoulder line. Fold the seam allowance towards the collar and iron about 2mm from the stitch line to form the kise, open and iron flat.

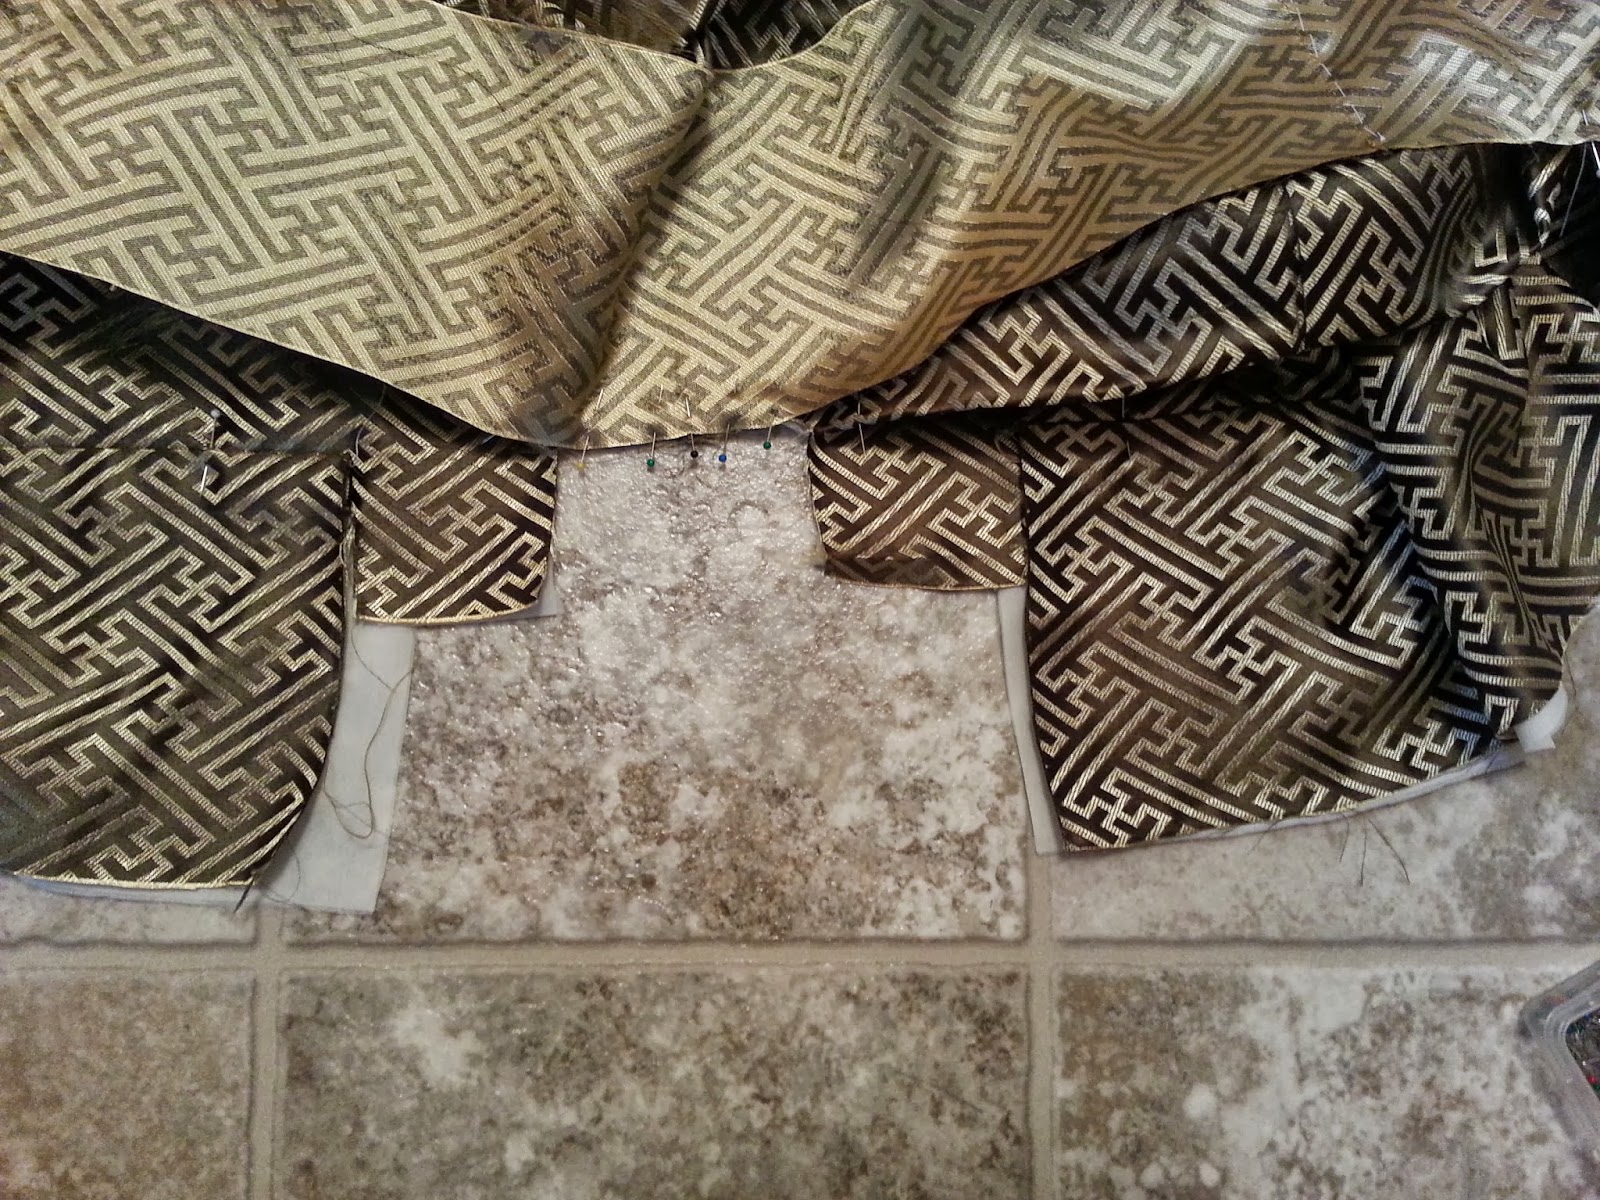
Often, the excess fabric from the okumi panels is folded up inside of the collar to provide extra structure and thickness, but my fabric is thick and the collar is narrow, so I trimmed it.

The excess fabric has been marked and trimmed to the width the finished collar will be.

However, there is no excess fabric at the base of the neck where the original slits were cut for the collar attachment. To give a bit more structure to the nape of the neck, a small bit of fabric can be added.

For adult woman's size, I use a 15x30cm piece of starched cotton that gets folded to size to fit in the collar, but I don't need much stiffness in this collar, so I used a small bit of extra fabric. Line it up to fit in the empty gap and baste it in place, then fold to size if using a larger piece.

6. Collar finishing
Now it is time to fold the collar to the desired width and get ready to sew the backside.
I do this in two steps. First from the front of the collar, beginning at the center back, I measure the width and fold the collar over, placing temporary pins along the outside fold (as in the left side of the above picture). Then I turn the kimono over and fold under the excess width so that it just covers the stitches from the previous step, moving the pin from the top edge to the inside edge.

Once the entire length is pinned, iron. Now it is time to address the bottoms of the collars.

Remove the bottom few pins and turn just the bottom section of collar back on itself, so that right sides are together, pin in place.

Sew the bottom of the inverted collar about 0.5cm from where it is attached to the okumi.

Turn the bottom of the collar back to right side out, with the excess edges turned to the lining side.

Pin it closed again so it all is neatly hidden inside.

Hand sew the collar closed. Start from the center back and work down one side at a time, otherwise the collar may warp slightly.

Optional - I stitched the himo to the front of the collar. A decorative stitch called himo kazari or semamori can also be sewn.

7. All Done!!


The kimono will need to be adjusted to fit, by sewing tucks at the waist and shoulders. I will wait to do that closer to when it will be worn, since my son is going through a growth spurt at the moment. If I have time, I will include a separate post on that, as often times I've seen people ask how to sew those tucks on children's kimono.

October 11, 2013

Shichi-go-san, Kimono body

I'm feeling really good right now, I've completely finished sewing an awase kimono for my baby boy! I have to say, it looks really good~~ But, I will show it off in the next post, for now I will continue showing my process of how I made it. I'm going to divide it up into 2 separate posts, this post will be constructing the body panels.

Before I get started, a few things I'd like to point out. This is a children's kimono, so the proportions are a little different from adult kimono, and the collar is also different, but that doesn't mean that you can't use my tips to make an adult kimono! The only real differences is in the measurements and collar, which I will add a note to the collar section of my blog post for how you can do a collar for adult kimono. For measurements, I suggest using an existing kimono you have as an example, adjusting as you see fit.

Looking through my kimono collection, I see two ways that body seams are sewn:
1. outer layer and lining sewn individually and then join at the seams with long basting stitches. This is the typical way, and it allows for some movement between the layers.
2. outer layer and lining sewn simultaneously. My more modern washable kimono are sewn this way, as well as several children's kimono I have.

The first method, I think is preferred, but great care must be taken to insure measurements on both layers are perfect to make sure they line up correctly. The second method makes it more difficult to replace the lining should it eventually need replacing, but it is faster to do, and since I am on a tight deadline to finish this ensemble, I decided to sew my lining simultaneously. If you chose to do the classic method and sew the lining independently, you can still follow my construction notes, just sew the two seams separately and then baste them together.

I used a sewing machine unless otherwise noted, but please use your preferred method. Remember, this is more like construction tips than an actual tutorial.

1. Back Seam
*NOTE* This kimono is small, so I chose to do the back by folding the fabric in half and then sew the back seam, and then cut the . Please note that typically this step involves sewing two halves together, but I am using western fabric and decided to skip cutting the fabric completely in half.
I carefully measured my lining and sewn my hakkake lining (lower hem lining) to both ends of my lining, and press the raw edges upwards, towards the doura lining.

I folded both the lining piece and outer piece in half widthwise, right sides together (see note above, for an adult kimono, or when using a kimono bolt, you will have 2 lengths of each, place them right sides together). Mark the very center of the lengths, both lining and outer, this will be where the shoulder fold will be. Sandwich the fabric together outer fabric on top, and starting from where the shoulder was marked on the left, pin them together down to the bottom. (Note: for sewing a woman's kimono, the collar is set back more from the shoulder fold, so mark another pin 2-3cm lower than the shoulder fold mark and begin sewing the back seam from there.)
Sew the pinned edge (1cm seam allowance is typical.), leaving a short distance near the hem unsewn (for me, I stopped roughly 2.5-3 inches from the bottom, doesn't need to be exact, just make sure it is enough to easily turn under the hem). Back stitch to secure stitching.

Separate the two halves of unfinished seam near the hem, lining and outer. Sew the remaining length of these two halves independently, back stitch to secure.
The result is like the kanji for person, äºº. Do this for all of your vertical seams. This will allow you turn in the raw edges and add padding for the hem.

With the layers still sandwiched, fold back the seam towards outer fabric half of the sandwich, and iron about 2mm past the stitch line. This will help form the kise fold (fold over of fabric that helps cover stitched seams) as well as train the raw edges to go in the correct direction.

Open up the layers and press the seam again, careful to not lose the kise fold. You can see through the fabric that the raw edges are to the right of the sewn seam when viewed from the lining side. 
At this point is when I decided to cut down the center of the rest of the length, which will become the front. Remember, typically a narrower kimono bolt is used, and this cut is unnecessary unless using wider western fabric. Also note, I did not cut slits yet for the collar - this is because I am using a brocade fabric that frays really badly, I did not wish for the cut for the collar to fray and lengthen while being handled before I get around to sewing the collar. Typically the collar slits would have been cut before now.

2. Side Seams
The side seams are done similar to how the front of the sleeves where sewn. I first ironed my shoulder fold to make this step easier. First, fold over the lining half at the shoulder fold, right sides together, than fold under the outer fabric at the shoulder fold (the outer fabric will be folded the opposite direction of the ironed crease).
My son was building his train set under the table as I worked <3
Half of the body is now sandwiched again with four layers, and two separate shoulder folds. I temporarily pinned the shoulder folds together to keep them even, and measured down the side where I wanted the bottom of the miyatsukuchi (armpit opening) and pinned the remaining length. The seam allowance will depend on how wide the back panels will be. I marked my seam line lightly with pencil, measuring the desired width from the back seam. Just like when sewing the back seam, stop sewing a little ways from the hem and then sew the remaining length independently, so that you will be able to turn under the hem - But, unlike last time, do the same at the top as well. Begin sewing a short distance (again, I did about 2.5-3 inches) down further than the first pin which marks the miyatsukuchi, and then come back and sew those first few inches under the miyatsukuchi independently. This will allow you to eventually match up the lining along the miyatsukuchi when it is time to attach the sleeves.


Do the same for the other side of the kimono. Fold the raw edge over towards the outer fabric side and iron about 2mm past the stitch line to form the kise, open up and press both sides again. I chose to trim the raw edge of the seam a bit, up until the miyatsukuchi just the reduce some bulk, but there is no real need to trim the seam unless desired.

3. Okumi panels
Now it is time to attach the okumi panels. At this point I needed to cut the slits for the collar, to help the kimono open up more for attaching the okumi panels.
This is a children's kimono, so the slits are cut directly on the shoulder fold. Woman's kimono, the collar slits are 2-3cm lower than the shoulder fold. It is difficult to determine how long this cut slit is from an existing garment, so for an adult woman's kimono, please cut 9.5cm from the raw edge (so, if the center back seam was sewn with a 1cm seam allowance, cut 8.5cm from the back seam). This is sized for a 3 year old, so my cuts were 4.5cm.

Okay, back to okumi panels! Sew the hakkake lining piece to the doura lining, press the raw edge up. The hakkake lining on the okumi is longer than the other panels. It should be a few centimeters longer than where you plan to have the collar end.

Now, the front panels of a kimono are more narrow than the back panels, so that means that the raw edges of the okumi pieces won't line up with the raw edges of the front panels. You can measure carefully and mark where needed, or trim the front panels so the raw edges are even, like I did. Not traditional, but it is a kid's kimono, and I want less bulk.

I measured and trimmed to allow a 1.5cm seam allowance. With right sides facing, layer, pin, and sew. Remember to sew the botton few inches independently to allow turning of the hem. Fold over and press about 2mm beyond the stitches to form the kise, open and press again.

Okumi panels are now attached! Most of the rest of the steps will have to be sewn by hand.

4. Hem preparation
Before sewing the okumi and suso hems, I like to make sure they are nicely creased. This makes it easier to insert hem padding before hand sewing. Unfortunately, it is time consuming, but prepping the creases before hand makes it much easier to do the hem without having to fuss over uncooperative hems when trying to insert the padding.

First, measure and fold under the free edges of the okumi panels, only to just past the hakkake lining. This is what I mean by time consuming: I first measure and fold under the outer layer, pinning in place, and then iron it flat. Then fold under the lining so that it is a tiny bit shorter than the outer layer, pin the lining down and then iron the lining flat. Lots of shuffling pins around, it can be a pain, but it looks nice. Be careful not to burn your fingers on hot ironed sewing pins.

Fold under and press the bottom hem, on the outside only.

When you get to the outside corners, the edge of the okumi hem goes over the bottom hem.

Next, start folding under the lining hem, matching up the seams. Leave a small amount showing, this is the suso-fuki, it protects the hem of the outer fabric, and it looks really lovely!


When you get to the corners of the hem, lift the corner of the folded over okumi hem...


...then pinch together the bottom the bottom corner of the okumi hem lining...


...and tuck the remaining lining hem inside. It might help to use a chopstick or skewer to neaten the inside so everything lays flat and even.

Iron the hems well, so that the lining's hem is nicely creased.

5. Hem padding
Now that the bottom hem is pinned together... it's time to take it back apart to insert the padding. Booo! After all that work, I know, sucks! But, thanks to that prep work, it will come back together easily, yay!


My padding material is cotton batting. You can get it in the quilt batting section of the fabric store. Typical polyester batting is too thick and airy for this use, but cotton batting tends to be thinner and more condensed. It comes in a rolled sheet for quilt making, so plan to have another use for the rest of it (I'll be using the rest as padding for a hifu vest), or you can use folded up interfacing. If you padding material is too short, you can cut two ends at 45 degree angles and join the pieces together with a rough stitch to make a longer piece.
 
Remove the pins from the lining hem and nestle the padding up against the ironed crease. Use pins to hold in place if needed. Do corners as pictured, leaving the corner flap free.


Hand stitch the padding in place. On the reverse side, take long stitches, I used my thumb as a guide.

On the side that shows, take tiny little stitches, that can barely be seen. Be sure to put a tiny stitch through the kise fold of each seam. Do not stitch through the loose flap in each corner. You can now remove the pins holding the padding and pin the two sides of the bottom hem back together again, and tuck the corners back in like done previously in the hemming prep stage.

6. Hem basting
Before sewing the hems closed, it helps to sewing basting stitches along the hems first. This helps keep the layers together far more evenly than pins do, and makes hand stitching much easier to do without accidentally pricking yourself. The basting stitches can remain in the kimono until it is ready to be worn.
I don't really have a method for basting stitches. I wasn't too terribly concerned on making them neat. On the front is a long-short-long pattern, and the back is a short-short pattern.
Now that it is basted and pins taken out, turn on a television show and get comfy for a night of hand sewing!

7. Hems
The hand sewing isn't particularly difficult. I don't know the name of the stitch used, but basically you go back and forth through the folded over part like a zipper motion, being careful to not accidentally poke the needle out through the layer that would show the stitch. The stitch should be invisible, completely hidden.
It is time consuming for me, as I can only do one pair of stitches at a time. For the okumi sides, it helped to sew with the lining facing towards me.

When done properly, the only stitching you should see in the basting stitches.

But when the layers are gently pulled apart, the stitches will look like this, a back and forth zigzag.


For the bottom hem, it helped to face the lining away from me. And I could take slightly larger stitches for this part.

That's it for now! I'll cover sleeve and collar attachment in the next post!

October 04, 2013

Lottery Kimono from Furicle

Recently, I received a package from Furicle, containing a kimono won in their weekly lottery! For those who haven't heard of Furicle, they are an online kimono store. They offer secondhand kimono items at reasonable prices, and every week they offer a free kimono item in a lottery. Please check out their website or "like" them on Facebook.

Apologies, I didn't have anyone to take my pictures, so blurry mirror pictures it is! The kimono is the color of Autumn, ochre and orangy-brown. To be honest, I completely forgot what the kimono looked like after I had entered the lottery, so when it arrived it was like opening a mystery present! Maybe that is just me getting old! Since I hadn't prepared anything ahead of time to coordinate, I decided to do a sort of monotone ensemble, thinking about the colors of the changing leaves outside.
I do not know the flower. At first I assumed it was nadeshiko, but it has 6 petals instead of 5, so I do not know. I used a cream nagoya obi that has gold stripes and orange and green karabana, and green accessories, obiage and buckled elastic belt, to echo the little bit of green in the edges of the flowers in the kimono and in the obi.


(I did not take out the basting stitches yet, since I am not wearing it for an outing. I will remove the stitches before I wear in public) My handmade yellow tabi actually paired well with the ochre in the kimono, but the camera didn't pick it up very well. My new orange Kinwashi-in zouri fit very nicely.

The color feels like autumn. While I do not know if the flower is nadeshiko, it think it is probably a type of dianthus flower.